
Sheeva is a nasty file-encrypting malware. It is a ransomware program that renders files useless on an infected PC. This virus is programmed to extort money from victims as payment for the decryption tool. After encryption of all data is complete, a ransom note named “Sheeva.txt” is created on the computer. This note contains a ransom message and instructions to purchase a decryption key.
While encrypting files, it adds the prefix “id[victim’s_ID].[Sheeva@onionmail.org]” to the original filenames and appends the “.sheeva” extension as the suffix. For example, a file named “photo.jpg” will get converted into “id[xmrJ9Lve].[Sheeva@onionmail.org].photo.jpg.sheeva”, and so on. This renamed file is an encrypted version of the original file and cannot be accessed without the decryption key.
Threats like Sheeva Virus keep getting back on PC if all associated files are not removed. So you are advised to use a powerful Malware Removal Tool to run a thorough scan of your PC and delete all threats at once.
Special Offer SpyHunter 5 Anti-Malware offers a 7-day fully-functional Free Trial. Credit card required, NO charge upfront. No charge if you cancel up to two business days before the trial period ends. Read SpyHunter 5 Review, and Free SpyHunter Remover details.What is Sheeva ransomware?
Sheeva is a data locker virus programmed to force users into paying ransom money. This threat encrypts all your personal files (documents, images, videos, audios, database, backup, etc.) with a very powerful algorithm. You can find a ransom note on your system asking you to contact cybercriminals and purchase the decryption tool.
The ransom message will instruct you that there is no other way to recover your files. It might also instruct you not to ask for help. You will be asked to contact the makers of this Sheeva virus via email and pay for the decryption. Other threats of leaking your data or deleting your files permanently can also be made.

Typically, it is impossible to decrypt files without the decoder key. This means you asking for help from cybercriminals. But they will charge you a huge sum of money through cryptocurrency. You cannot track who got your money once you pay.
What to do after infection?
You should remove this Sheeva virus immediately to prevent further encryption of data. It is very important to remove the ransomware if you hope to recover your files. Removal of this will not restore your encrypted files, but you can recover your data through backup.
If your backup files are also on your computer then they might have also been encrypted. It is advised to keep a backup of all your important files on an external hard drive, USB drive, or cloud drive to avoid major data loss.
In case if your backup files are encrypted or you don’t have any backup files at all then use professional data recovery software. They might be able to scratch up most of your files with the original extension.
How did ransomware infect my computer?
Ransomware threats like Sheeva and other malware are mostly spread through spam emails campaigns. Cybercriminals use automated software to send loads of fake emails. They might seem legitimate but they can carry malicious file attachments and links. Opening those emails, downloading files, or clicking such links can trigger the download of malware on your PC.
Untrustworthy freeware download websites, Peer-to-Peer (P2P) sharing networks, and porn or torrent sites and also spread threats. Cracked software or illegal activation tools, fake updates, and patches for games are also used for malware distribution.
Third-party installers also install some unwanted applications on the system that can make your PC vulnerable. Tons of unwanted ads causing frequent browser redirection is a sign of trouble. Your browser could land on a website carrying malware ready to execute on a single visit.
Sheeva Ransomware: Threat Analysis
| Name | Sheeva |
| Type | Ransomware, File-Encrypting virus |
| Extension | .Sheeva |
| Threat Level | High (Encrypt all your data and Restrict access to your files). |
| Symptoms | Victims cannot access any files on their PC and find Ransom notes asking for money. |
| Damage | Sheeva will encrypt your data by adding its extension to file names and demand ransom money for the decryption key |
| Distribution | It is mainly distributed through spam emails, bundled freeware, porn, or torrent sites. |
| Removal | Download SpyHunter 5 Anti-Malware |
| File Recovery | Download Data Recovery Software |
Do not pay the Ransom Money
It is advised that you do not contact cybercriminals at any cost. It is highly likely that they will cheat your money. All your files are already encrypted, do not risk your money too. It is not certain that you will get your files back after paying.
Many claims have been made by ransomware victims’ that they did not get the decryption tool after paying. Cybercriminals stop all communications after getting paid. It is best to buy a powerful Anti-Malware program to completely remove this Sheeva virus. Also, try professional data recovery tools to recover your files.
Once you pay the ransom amount to buy the decryption tool, you cannot get a refund if it doesn’t work. Moreover, creators of this virus can also target your files in the future for more money. Put an end to this extortion at once by removing this virus.
Ransom note “Sheeva.txt” contains the following instructions :
::: Greetings :::

Your important data, including financial/development, accounting, strategies, and other vital documents and databases, have been downloaded and will be leaked soon if not paid.

===========================

Little FAQ:
.1.
Q: What's Happened?
A: Your files have been encrypted and now have the "Sheeva" extension. The file structure has been changed to unreadable format, but you can recover them all with our tool.

.2.
Q: How to recover files?
A: If you wish to decrypt your files, you will need to pay in bitcoins.

.3.
Q: What about guarantees?
A: It's just a business. We absolutely do not care about you and your deals, except getting benefits. Nobody will cooperate with us if we do not do our work and liabilities. It's not in our interests.
To check the ability to return files, you can send us two files (under 5MB) of any kind that do not contain critical information. We will decrypt them and send them back to you. That is our guarantee.

.4.
Q: How to contact us?
A: You can write us to our mailbox: Sheeva@onionmail.org and Sheeva@cyberfear.com
write this in the email title: ID:-

.5.
Q: How will the decryption process proceed after payment?
A: After payment, we will send you our decoder program and your ID's unique keys + detailed instructions for use. With this program, you will be able to decrypt all your encrypted files.

.6.
Q: If I don't want to pay bad people like you?
A: If you will not cooperate with our service, it does not matter to us. But you will lose your time and data cause we are the only ones that have the private key. In practice - time is much more valuable than money.

:::BEWARE:::
1.1 DON'T try to change encrypted files by yourself!
If you use any third-party software to restore your data or antivirus solutions, please make a backup of all encrypted files!
Any changes in encrypted files may entail damage to the private key and, as a result, the loss of all data.
.2. Any company/person claiming to decrypt your data without paying us, they're simply lying and will charge you a lot of extra money for that; they all contact us and buy the decryptor from us.
.3. message from Developers: to avoid any possible problems with this email agent, always as for test files, never pay anyone outside of these two emails, only pay to wallet address we send you along with the test file, this will guarantee you recover all your files with no risk
.4.Some files were encrypted but not renamed; these files will be restored after the decryption procedure is completed.

/**IMPORTANT***/
.5.DO NOT delete the C:/Sheeva folder (it's a hidden folder) otherwise decryption will be IMPOSSIBLE
/**IMPORTANT***/
How To Remove Sheeva Virus
Sheeva File Virus is a dangerous malware that can cause major damage to your computer. This nasty threat will bring several new problems on your PC. This is why it is quite imperative to delete this threat permanently before it completely damages your entire computer system. Once it manages to infiltrate your system, it will make your system vulnerable. This nasty malware is capable of bringing other harmful viruses on your system without your consent. It can completely obliterate your system performance in no time. This virus also has tendency to hide its malicious copies at various locations on your PC under different names. It is not an easy job to find and remove those virus related files manually.
In this guide, you will find instructions for two very different techniques to get rid of Sheeva Virus infection . The first one is the Automatic Removal which is quite fast, effective and accurate. The second method is Manual Removal which usually takes lots of time, needs technical expertise, and often fails to give desired results. However, it is advised to take help of both techniques to ensure complete removal of the malware from your system. In case you are not handy with system operations and techincal stuff, just opt for the automatic malware removal process to eliminate Sheeva Ransomware.
Automatic Sheeva Virus Removal Guide
As you already know that, Sheeva Virus is a notorious and cunning malware. It is quite hard to remove through manual means. This virus can create various files and shortcuts or modify system settings. It can keep coming back on your computer using them. Removing all those at once is the only way to get rid of this infection. It will also ensure that this virus cannot sneak into your system ever again.
Remove Sheeva virus effectively with a powerful Automatic Removal Tool. It will save you lots of time and effort. It can detect and remove all hidden threats like Trojan, Ransomware, Worms, Spyware, Rootkits, etc. You will also get 24X7 customer support and one-on-one Spyware HelpDesk support. Advanced System Guard feature detects and removes threats in real-time. It has a very User-Friendly Interface and regular Malware updates make it most effective against the latest malware attacks.
How SpyHunter 5 Anti-Malware Works
- First, you need to click on the below download button to get the software.
Geek’s Recommendation
Some time threats like Sheeva Virus keep getting back on the machine if all associated files are not removed. You should use a powerful Malware Removal Tool to run a thorough scan of your PC and delete all threats at once.
Compatible with: Windows 11/10/8/7 (32 Bit and 64 Bit)
- Then double-click on the installer you downloaded to install the program.
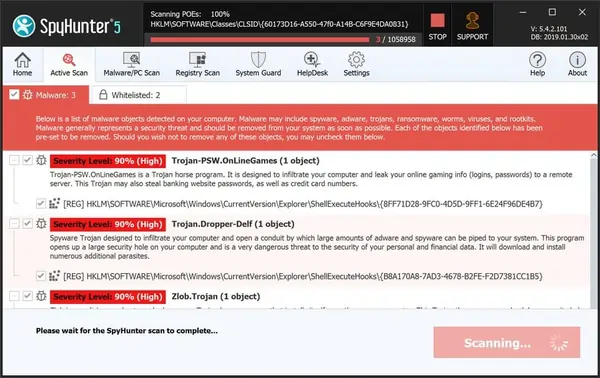
- Launch Anti-Malware application and Start Scan Now of your PC.
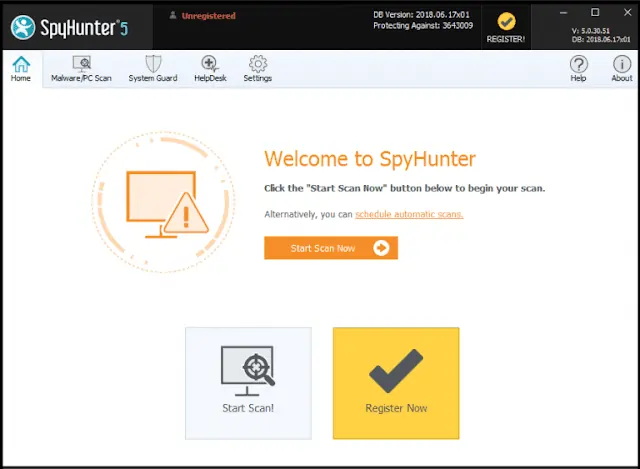
- The software will scan your PC for all hidden threats and viruses on your system.
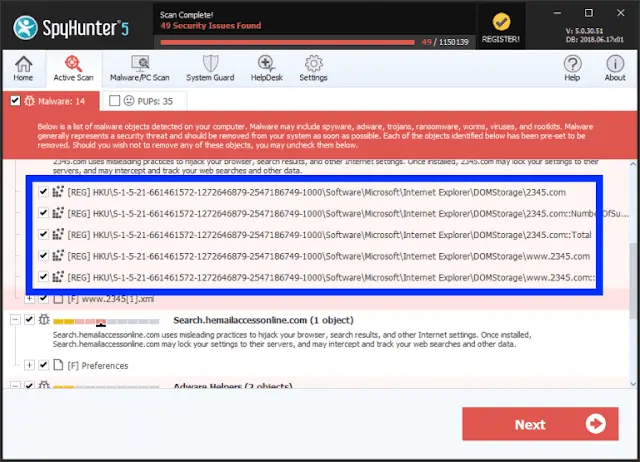
- Click on the Next button to see results and delete Sheeva and other threats.
How To Recover .Sheeva Files
After removing .Sheeva Virus, you need to recover your data. If your files are important then you must have created a backup. If yes, then you can use that backup to recover your files. In case you don’t have a backup or this virus has encrypted your backup files, then you are left to seek professional help.
At this point, there is no Sheeva ransomware decryption tool available. We recommend you use powerful data recovery software to decrypt .Sheeva Files. It is a risk-free and smart way. You can just download the free version and scan your PC for files. There is a high probability that it can recover most of your files. It is also needless to say that paying the ransom will only motivate cybercriminals to carry out more attacks.
- First, you need to download Data Recovery software on your PC.
Download Data Recovery Software
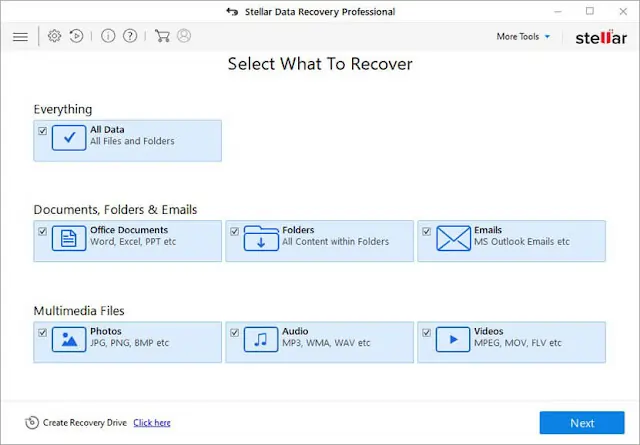
- Install the program, launch it then select the Data type to recover, and click the Next button.
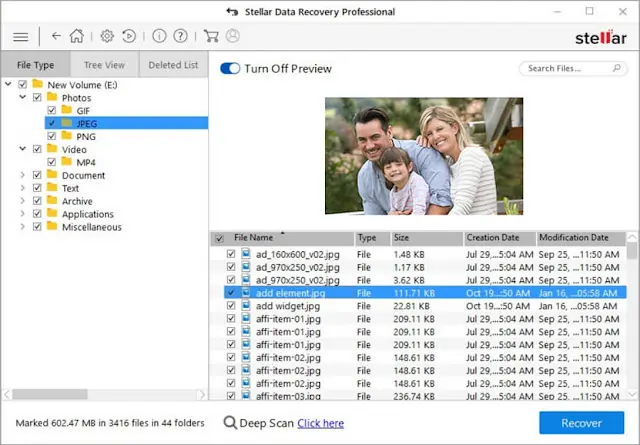
- Select the location from where you want to recover data and click the Scan button.

- After the scan, software will list all files, select them and click the Recover button.
Manual Sheeva Removal Guide
- You have done this before, which means you have experience in removing the virus manually;
- That you know your way around PC and all necessary processes and applications;
- You know about Registry entry and the Serious repercussions of any mistake;
- Make sure you can reverse any mistake made during .Sheeva Virus removal.
If you don’t attain any of the above standards, then manual removal could be a very risky idea. It is most likely best for you to use the Sheeva Ransomware Removal Tool which is totally secure and efficient method.
Compatible with: Windows 11/10/8/7 (32 Bit and 64 Bit)
Start PC in safe mode with networking
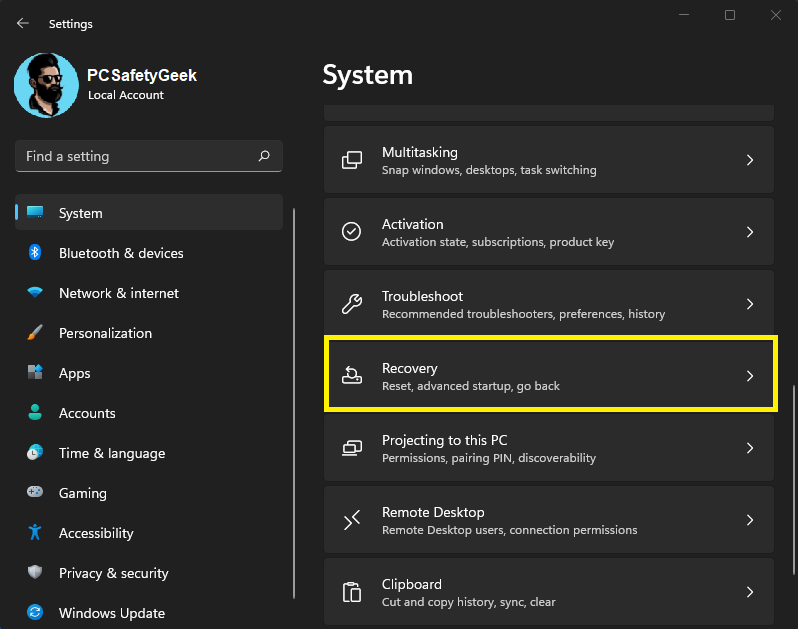
[mks_tabs nav=”horizontal”] [mks_tab_item title=”Windows 11″]- Press Windows & I keys together on keyboard to open Settings page and select Recovery option.
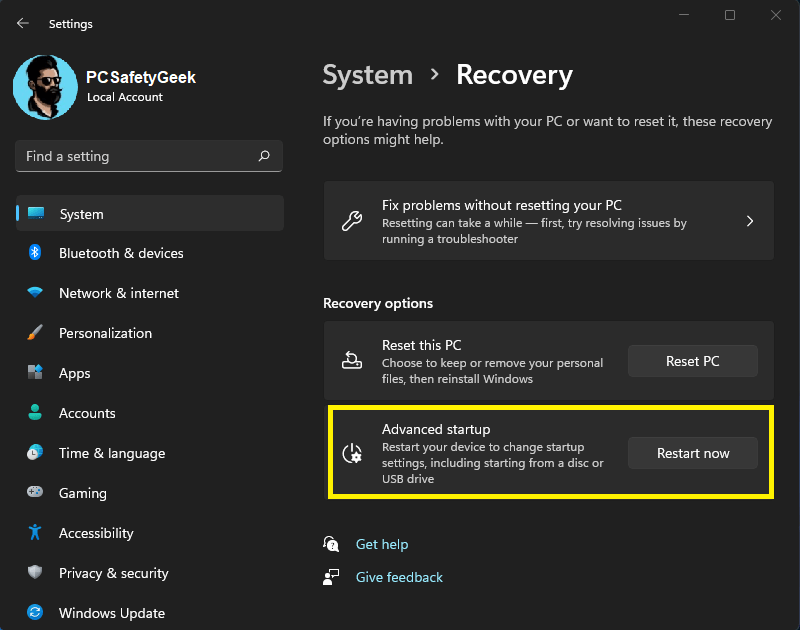
- Now from the Advance settings option, click on Restart Now button.
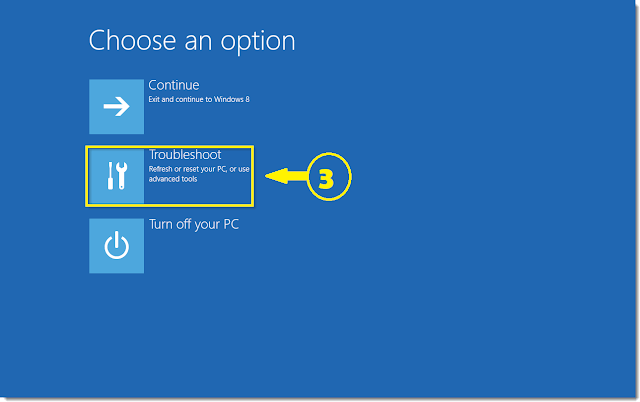
- Select the Troubleshoot option from the list.
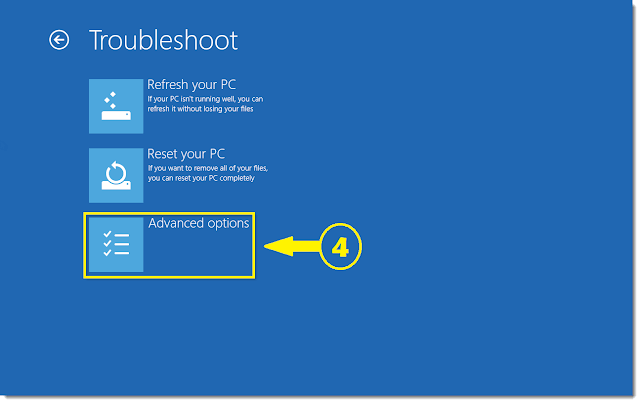
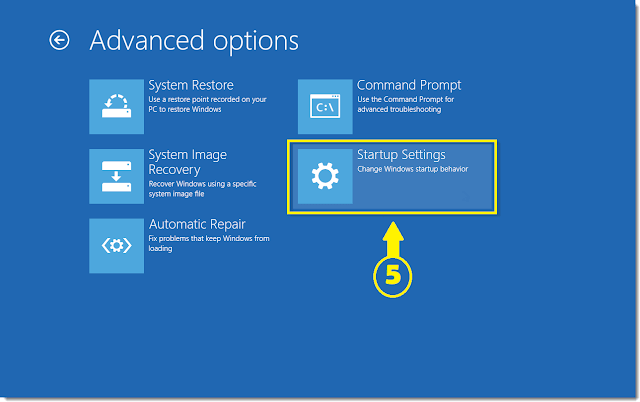
- Click on Advanced Options from the Troubleshoot menu.
- Click on Startup Settings from the Advanced options.
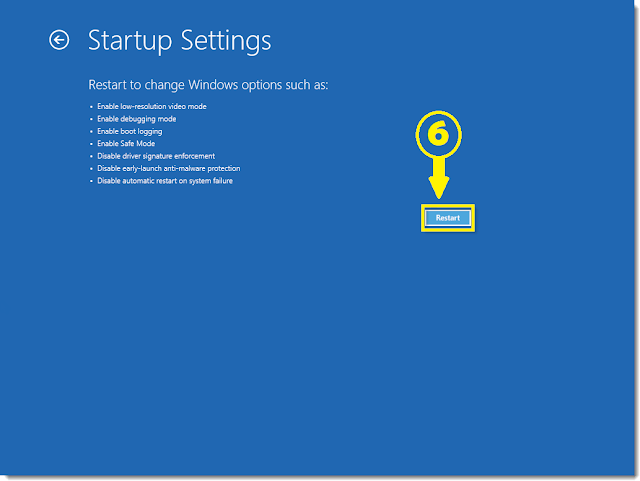
- Press the Restart button on this page.
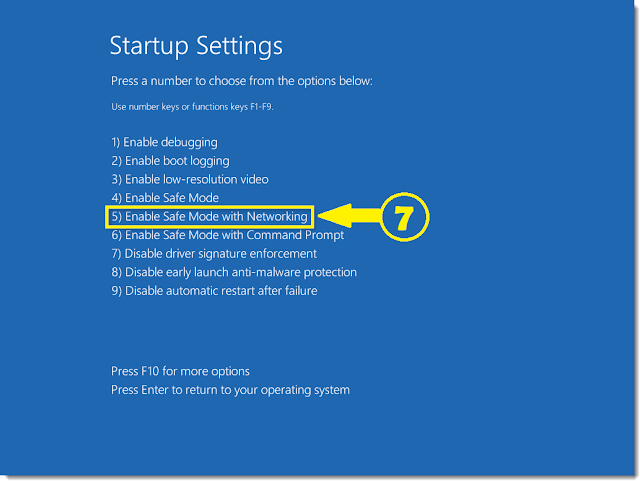
- Finally, hit 5 to start your PC in Safe Mode.
 [/mks_tab_item] [mks_tab_item title=”Windows 10″]
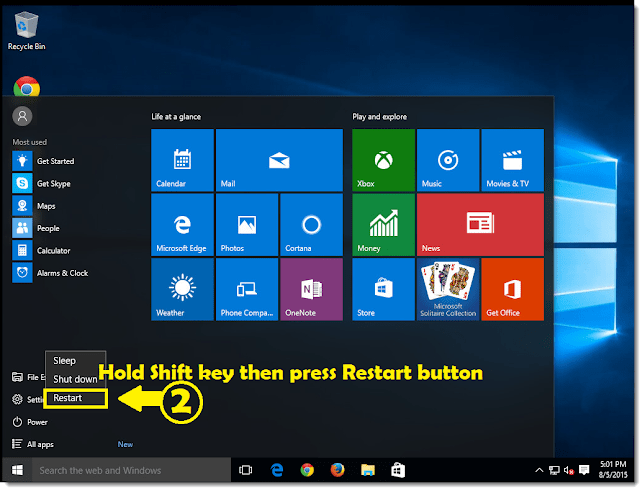
- Click on the Start button and press the Power button.
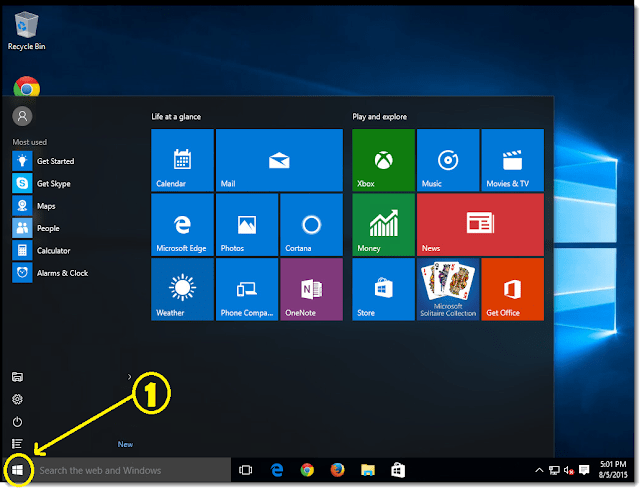
- Hold the Shift key and click the Restart option.
- Select the Troubleshoot option from the list.
- Click on Advanced Options from the Troubleshoot menu.
- Click on Startup Settings from the Advanced options.
- Press the Restart button on this page.
- Finally, hit 5 to start your PC in Safe Mode.
[/mks_tab_item] [mks_tab_item title=”Windows 8″]
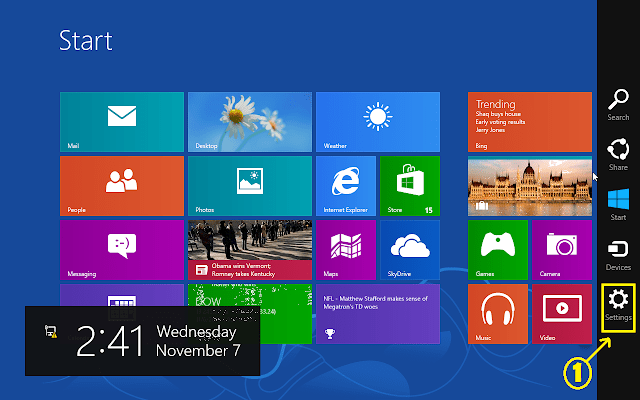
- Press Windows & C buttons on the keyboard then select the Settings option.
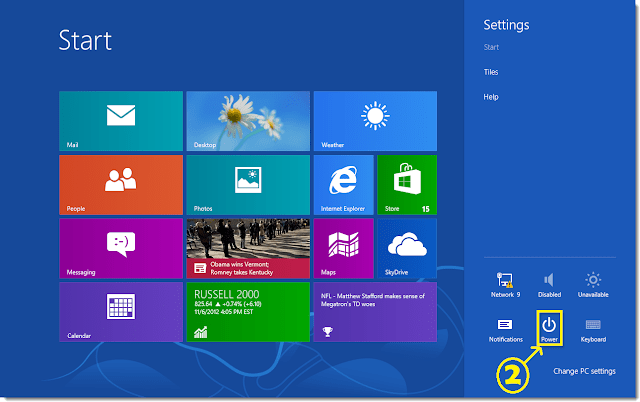
- Hold down the Shift key then click on the Restart button from the Power option.
- Select the Troubleshoot option from the list.
- Click on Advanced Options from the Troubleshoot menu.
- Click on Startup Settings from the Advanced options.
- Press the Restart button on this page.
- Finally, hit 5 to start your PC in Safe Mode.
[/mks_tab_item] [mks_tab_item title=”Windows 7″]
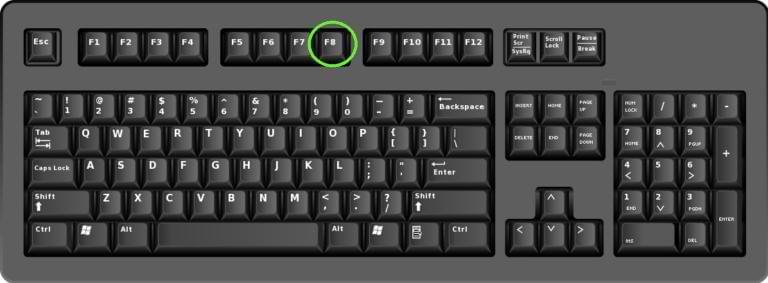
- Click on the Restart button, wait for Windows to load, and start pressing F8 button before the Windows splash screen shows.
- From the Advanced Boot option, use arrow keys to select Safe Mode with Networking option.
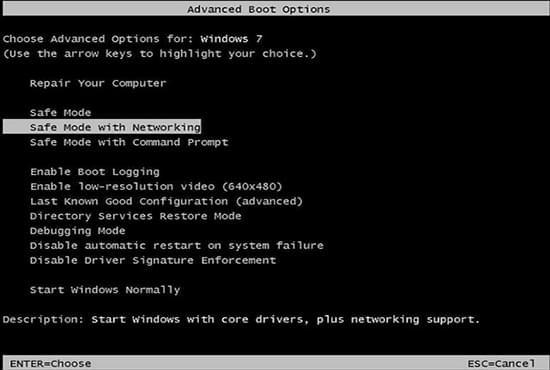
- Press ENTER button to start PC in safe mode.
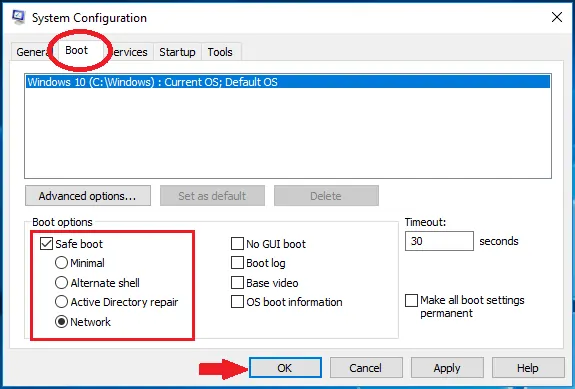
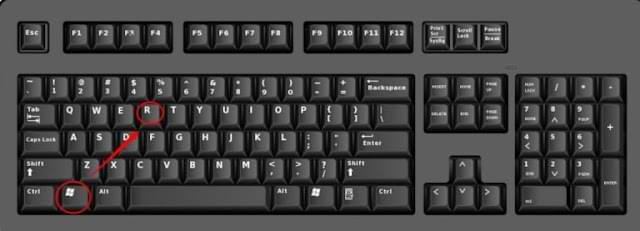
- Press Windows Key + R buttons together on the keyboard.
- Type msconfig in the Run Box then click the OK button.
- Click on the Boot tab to open the System Configuration window.
- Choose Safe Boot, check the network box, Click Apply, and press the OK button.
 [/mks_tab_item] [/mks_tabs]
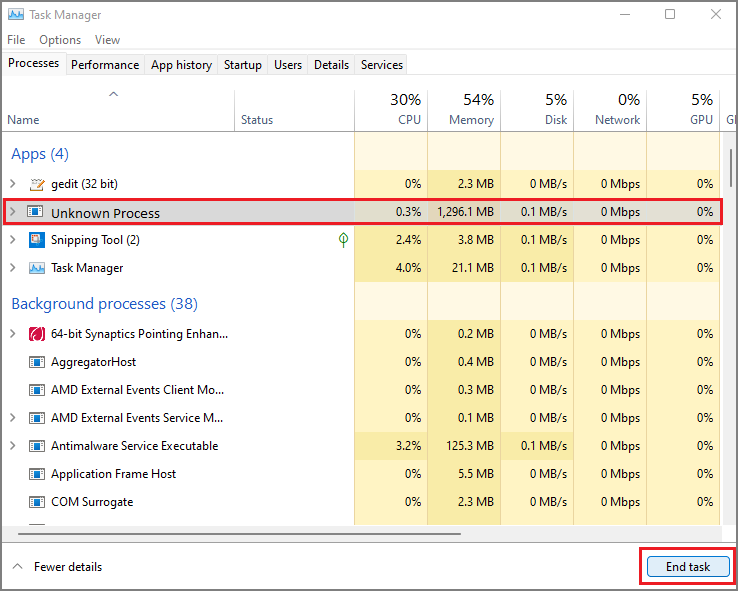
End Process From Task Manager
- Press Windows Key + R buttons together on the keyboard.
- Type taskmgr in Run Box and then click the OK button.
- Find any Sheeva Virus related process.
- Now right-click on it then click End process.
Uninstall Sheeva from Windows PC
[mks_tabs nav=”horizontal”] [mks_tab_item title=”Windows 11″]- Right-click on Start or Windows button and select Apps and Features option.
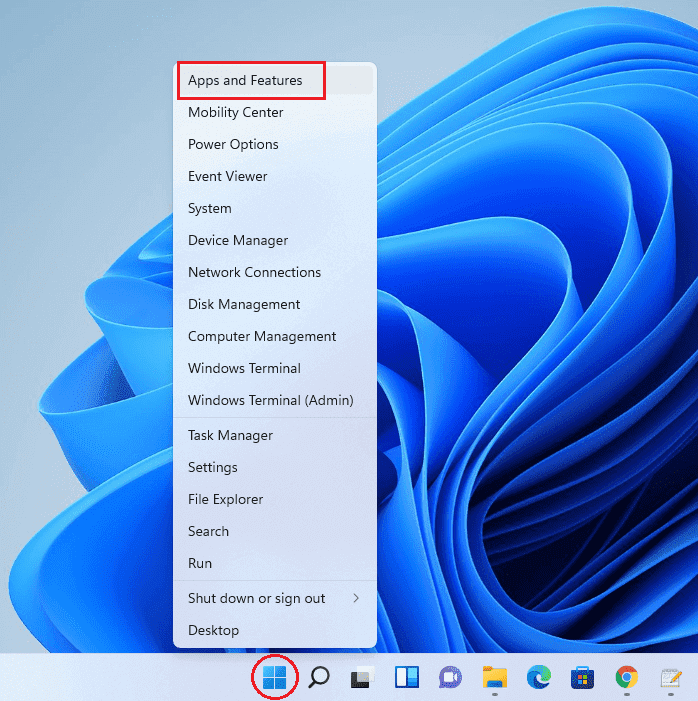
- Find Sheeva or other harmful programs, click on three dots icon, and press Uninstall button.
 [/mks_tab_item] [mks_tab_item title=”Windows 10″]
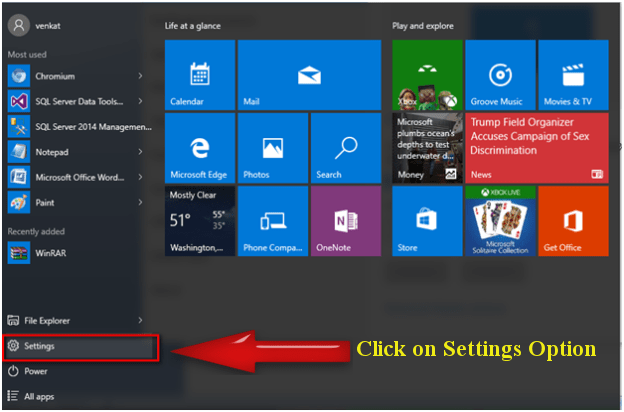
- Click on the Start or Windows button and click on Settings option.
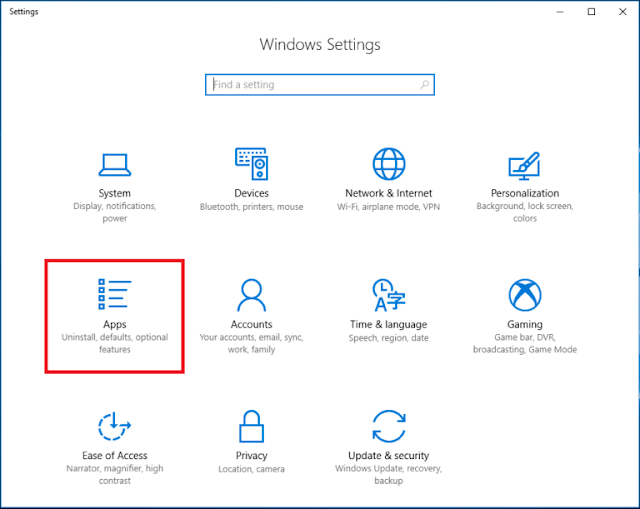
- Click on the Apps option from Windows 10 settings page.
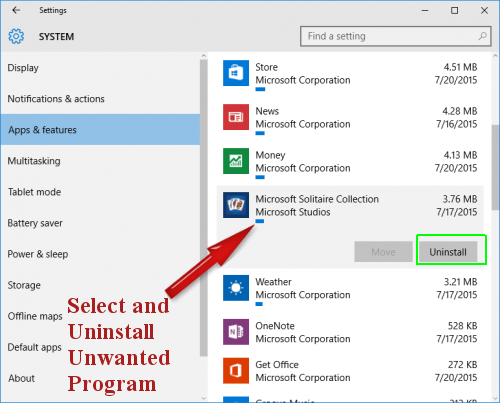
- Find Sheeva or other harmful programs, then click on Uninstall option.
 [/mks_tab_item] [mks_tab_item title=”Windows 8″]
- First of all Press Windows Key + R buttons together.
- Type appwiz.cpl in the Run Box and then click OK button to open Programs and Features windows.
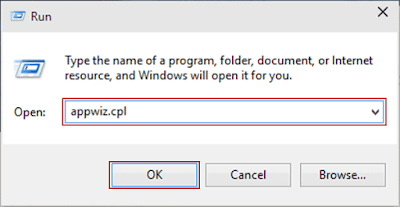
- Find and remove Sheeva or other harmful programs.
 [/mks_tab_item] [mks_tab_item title=”Windows 7″]
- Click on the Start or Windows button and select Control Panel option.

- Click on Uninstall A Program option under the Programs section.
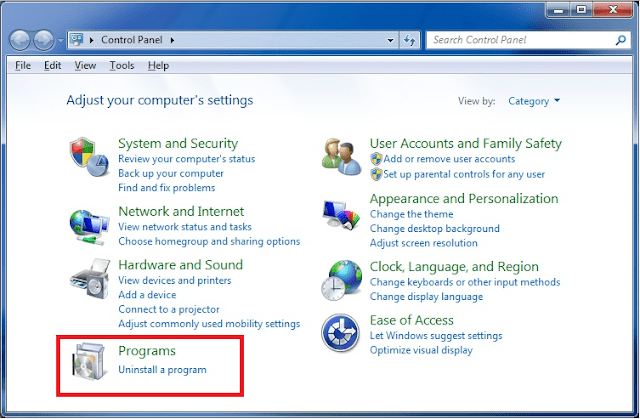
- Find Sheeva or other harmful programs and click on uninstall option.
 [/mks_tab_item] [/mks_tabs]
Compatible with: Windows 11/10/8/7 (32 Bit and 64 Bit)
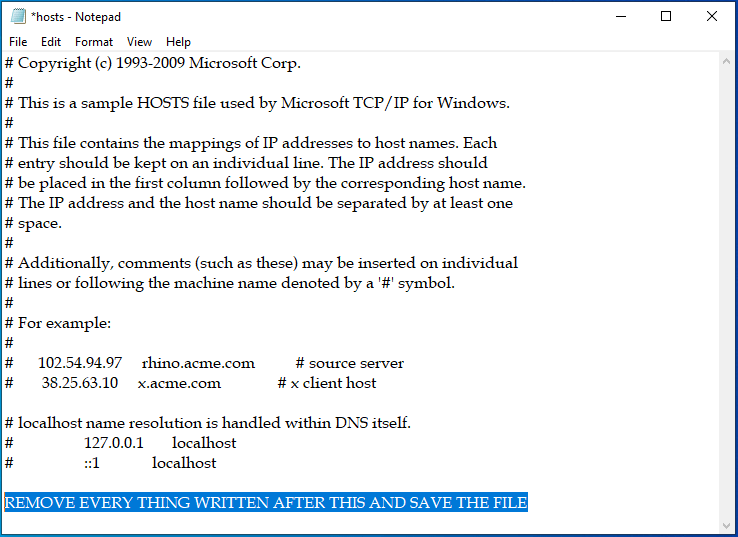
Remove Virus related IP address from Hosts Files
- Press Windows Key + R buttons together on the keyboard.
- Type
C:Windows/System32/drivers/etcin Run Box and then click the OK button. - Now open the hosts file with Notepad.
- Look for any suspicious IP address that might be related to Sheeva Virus.
- Delete all the unknown IP addresses and save the host files.
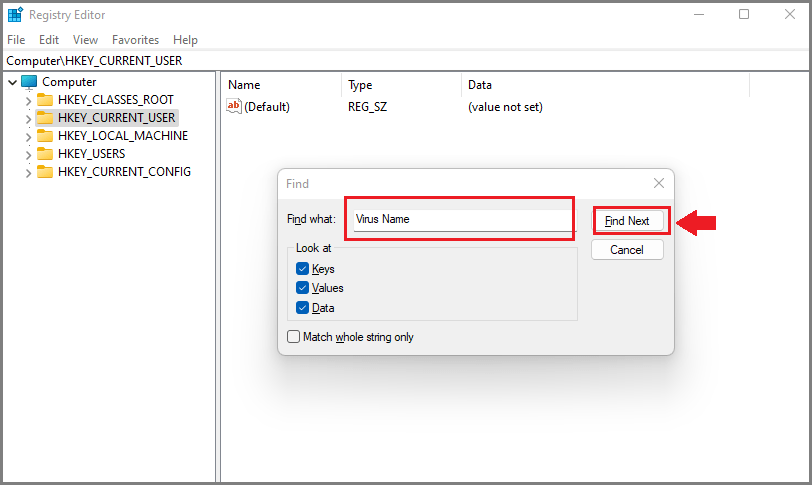
Remove Virus related Windows Registry entries
- Press Windows Key + R buttons together on the keyboard.
- Type regedit in Run Box and then click the OK button.
- Registry Editor will open, then press CTRL +F buttons together.
- Now type Sheeva and then click on Find Next button.
- Find all the related entries and delete them one by one
Delete Virus related files from your PC
When a threat gets on to a PC, it most likely creates some files at different locations on the system. These files are used to perform a specific action and also help malware in getting back to the computer once it’s removed. So you just need to find also delete all those files associated with this .Sheeva File Virus. For that follow the below instruction :- Press Windows Key + R buttons together on the keyboard
- Type each of the following in Run Box and press the OK button
- %AppData%
- %LocalAppData%
- %ProgramData%
- %WinDir%
- %Temp%
Remove Sheeva Virus via system restore
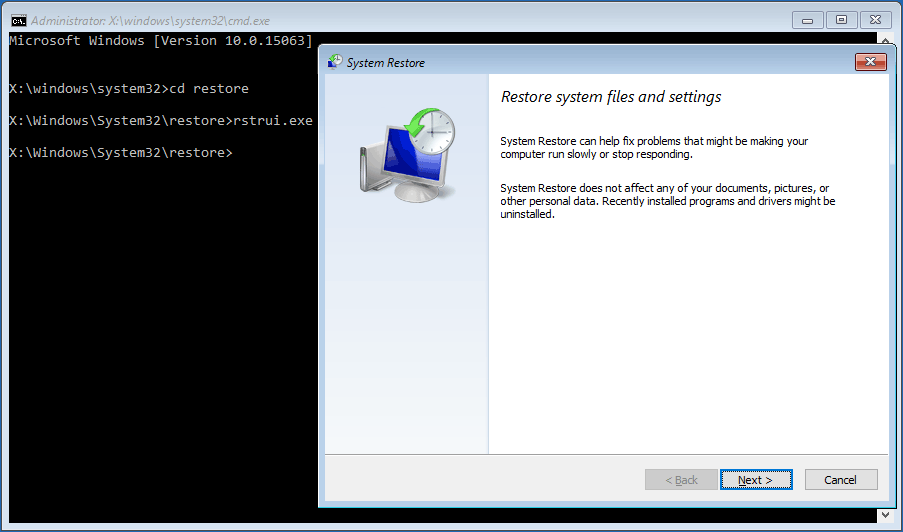
- Press Windows Key + R buttons together on the keyboard.
- Type cmd in Run Box and then click the OK button.
- Type cd restore and press Enter, then type rstrui.exe and press Enter.
- When the System Restore window opens on your computer screen click the Next button, then choose a System Restore point you have created in the past and click the Next button.
- Finally, click on the Yes button to start the system restoration process.
Note: This will only work if you have a restore point set on your PC or it will give an error message. Restoring the computer to a previous version may or may not remove .Sheeva File Virus. Most of the time, viruses just delete all the restore points. If this trick does not work for you then don’t get disappointed.
After restoring your computer, we recommend you run a thorough scan of the PC using a Powerful Anti-Malware program to detect and remove any hidden threats. In most cases, viruses may spread through any files outside of the C drive because system restoring only affect the C drive. There may be some Virus related files hiding your PC, and it never hurts to double-check.
Sometimes, system restore doesn’t work or viruses can just remove the restore points. As such you will probably have no other choice than to choose the Automatic Removal Process. It is the best and error-free method to find and remove threats from your computer. Additionally, you should also check some important malware prevention tips provided here in this guide to avoid similar virus attacks in the future.
Remove Sheeva Virus From MacOS
If you are a mac user, and your machine got infected by this file-encrypting malware then you need to remove it as soon as possible. Although Mac systems are quite safe they still do get infected. So you can delete this infection using the below steps:Stop Virus From Activity Monitor
- First, you need to open Utilities folder on your Mac system.
- Find the Activity Monitor icon and double-click on it to open it.
- Find Sheeva related process, click the cross button from the upper left side corner to end task.
- A pop-up dialogue box will appear on the screen, click on the Force Quit button.
Remove Virus From Application Folder
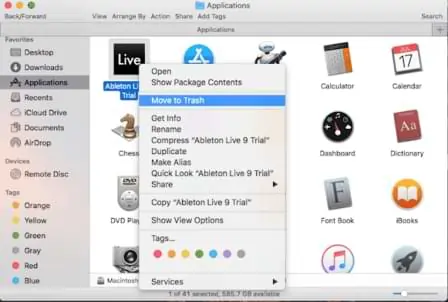
- First, go to the Dock option (bottom of your screen) then click on Finder App.
- Now you have to open the Applications Folders to see all the programs.
- Find Sheeva or any other unwanted program then move it to Trash.
Remove Sheeva Virus Related Files From Mac
When any program is installed on your Mac, it creates several files on your system that support the functioning of that application. If you need to remove any virus from your Mac, then you need to delete all related files completely. These files could be found at :- LaunchAgents
- Application Support
- LaunchDaemons
- First of all press the Command+Shift+G buttons together on your keyboard.
- Now you can see Go To Folder option on your Mac screen.
- Type in /Library/LaunchAgents in the text field and click on Go button.
- Find and remove any Sheeva Virus related files.
Attention: If you are not tech-savvy, then it could be quite difficult to remove Sheeva File Virus manually from your Mac. The best way is to download SpyHunter Mac Anti-Malware and see if it can detect all hidden threats and viruses on your computer. It’s really super easy and you should give it a try.
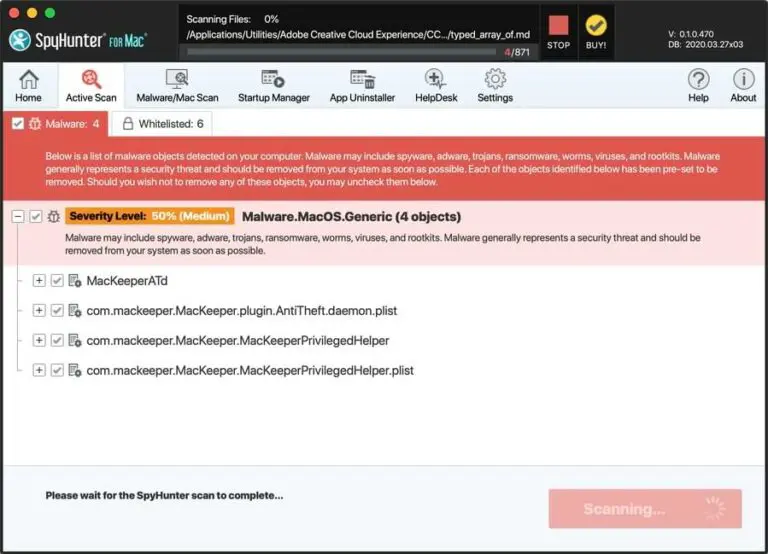
How SpyHunter Mac Anti-Malware Works
- First, download the SpyHunter for Mac by clicking on the below button.
Some time threats like Sheeva Virus keep getting back on the machine if all associated files are not removed. So you are advised to use a powerful Malware Removal Tool to run a thorough scan of your Mac and delete all threats at once.
- Now go to the Download Folder from the Docs and Install the SpyHunter Anti-Malware For Mac.
- Launch the Program, and click on Start Scan Now button.
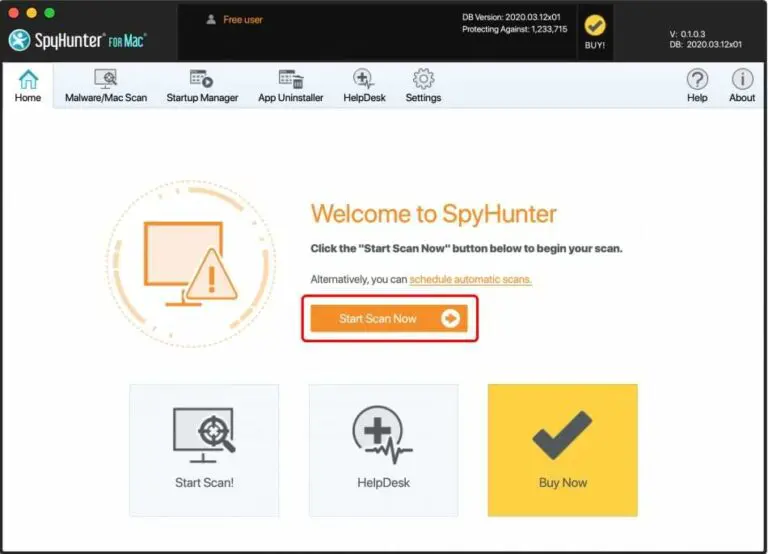
- The software will start running a full scan of your mac instantly to look for any malware or security risks, and so on.
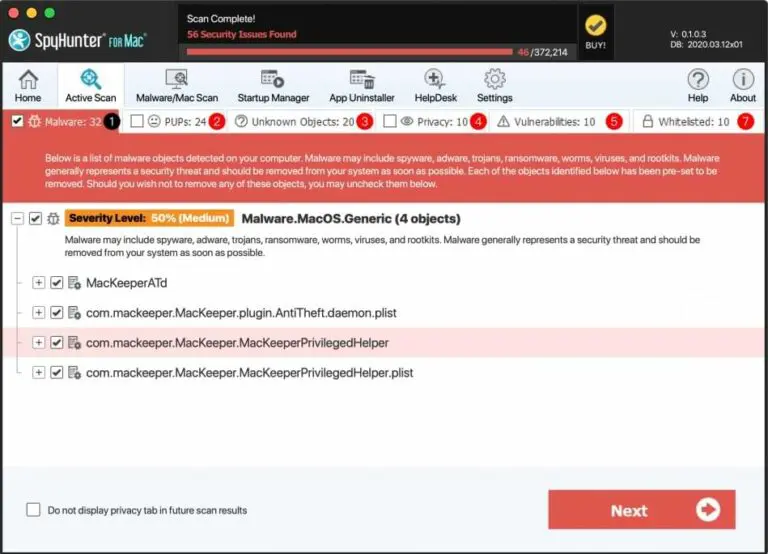
- Finally, you will see a list of malware detected on your mac, now click on the Next button to start the removal process.
Tips To Prevent .Sheeva Virus in Future
- Use a good anti-virus, be it a free version but don’t use cracked security programs.
- Make sure that your Windows firewall is active, so it can block upcoming threats.
- Keep your Windows/Mac OS and other programs updated to avoid vulnerabilities.
- Download updates only from official websites, don’t use suspicious sites.
- Never download and install pirated software, games, or illegal patches on your PC.
- Do not open spam emails from an unknown sender and scan all attachments before opening.
- Never download freeware third-party programs from unreliable sources or websites.
- Avoid connecting your PC to unsafe public Wi-Fi to protect your privacy.
- You can also use a VPN to spoof your connection and avoid harmful sites.
- Create a system restore point on your system for security purposes.
- Keep a backup of all your important files to avoid data loss.
Some time threats like Sheeva Virus keep getting back on the machine if all associated files are not removed. So you are advised to use a powerful Malware Removal Tool to run a thorough scan of your PC and delete all threats at once.
Compatible with: Windows 11/10/8/7 (32 Bit and 64 Bit)
Leave a Comment